Monday 30 April 2012

Seraphina in the Rain

Afternoon everyone

Today I am sharing a card I designed in Craft Artist Professional.  Some of the member of the Facebook group Serif Craft Artist Users Group decided that as we have been having so much rain we should make a "rainy" project.  The result was some lovely scrapbook pages and this card was my own contribution.

This was how I designed it in CAP first


For the topper I used the Seraphina character image from my cd "Seraphina Through the Ages" and placed in onto a background image from MCS "A Very Important Date".  I created the rainbow myself in Craft Artist and added it to the top corner of the topper, and then added some extre "rain drops".  I also created the red mat behind the topper, the sentiment and the blue and red little round embellishments in CAP.

And the matching insert as seen in CAP


Finally I had to decide how I was actually going to make up my card - to print it out in one piece, to print each element separately or to just print off the topper.  I finally decided to print out the topper and sentiment separately, and to print the rest out in one piece, but I removed the ribbon and bow before I printed as I decided to replace them with real ribbon.

Here is the finished card


I mounted the topper using thin foam tape, added the ribbon and bow but left off the sentiment as I decided to wait until I had a recipient for this card and make a personal sentiment at that point.  I also used glossy accents on the rain drops and on the little circular embellishments.

And the finished insert, trimmed around the edges slightly to ensure a neat fit.

I think this makes for a nice cute and colourful rainy day card!

If you are interested in learning more about Craft Artist or in sharing hints, tips and projects with other like minded crafters, please click here and ask to be added to our group.

Thank you for calling in.

Catherine x

Sunday 29 April 2012

Christine's Daisy

Evening everyone

Well at last I have managed to make another card.  Yesterday I bought one of Christine Gray's lovely digistamps.  I again chose to practise colouring with my polychromos pencils so I only hope Chris thinks I have done her lovely stamp justice.

First of all I have to say that the glue was still wet on the bow and it slipped while I was taking this photograph so it's not actually at that angle now!

Before Easter I tried my hand at distressing for the first time when I distressed a little case for my son's partner but before I started on the case I had a quick try on an oval piece of mountboard.  This I did by using green emulsion paint onto the mountboard and when it was dry I applied a coat of pva glue, followed by white emulsion paint and then used a heat gun.  So today I took this oval and added some Tim Holtz distress ink around the edges and used it for Christine's daisy.

I made my own background paper in Craft Artist, using the colours I had used on the daisy stamp.  Once printed I tore (neatly!) around the edges and then distressed the backing paper using more TH distress ink.  The central oval is mounted onto Coredinations card which was cut using a Spellbinders die and then lightly sanded around the edges.  I finished the card with ribbon from my stash (and made that wonky bow!!).  As usual I haven't yet added a sentiment but will do this when I know who the recipient of this card will be.

And finally I have used Craft Artist to make the insert


This is a scrren shot as I haven't yet printed it out so will decide then whether to leave it as is or whether to distress it to match the front.

As I haven't made many cards recently I haven't entered any challenges either, so I have decided to enter this one into the Crafty Bloggers Network challenge 20, "Love Paints".

Anyone who would like to join the Serif Craft Artist Users Group on Facebook please click here and ask to be added to the group.

Thank you for visiting my blog.

Catherine

Thursday 26 April 2012

Poppy card, using a digita stamp for the first time.

 Good afternoon everyone

Just a very quick post from me today to share a card I have just made.   It has taken me all day bobbing backwards and forwards to the craft room but I got there in the end.

The image is a digistamp from Joanna Sheen's Pamela West Collection 2 which I coloured with my polychromos pencils.  This was a first for me in more way than one - I have never used a digistamp before and I have never used my p pencils on anything other than parchment.  Any suggestions for what blending solution to use would be gratefully received - I did this image just using the pencils to blend colours one into another.

Here's the finished card


As always I used my Craft Artist Professional to make the insert.


On this occasion I have left it completely blank as I consider this to be a "generic" card - suitable for all sorts.

Thank you for visiting my blog

Sunday 22 April 2012

Just for fun.

Hello everyone

So, when is a heart not a heart?  When it's a mutant penguin of course!  I was playing around with shapes in CAP and drew a heart using the shapes function.  I challenged myself to turn it into something else without using any other shapes and some time later, after a lot of copying, pasting, manipulating and even cutting with the scissors tool I ended up with this


Poplular opinion seems to be that this is a mutant penguin.  So then I played a bit more, this time using a circle too and ended up with


So this is obviously the good guy penguin!

And finally I played around a bit more with mutant penguin, added some bits from a digikit and got this


But he needs a caption to finish it off - any suggestions?  (but only polite ones mind!)

And now I think I should try and get back to doing some real crafting - but it is fun to have a play.

If you are interested in joining the Serif Craft Artist Users Group on Facebook then please click here and ask to be added to the group.

Thank you for dropping by.

Catherine x

Saturday 21 April 2012

My very first attempt at drawing/painting in Serif Craft Artist Professional

Hello everyone

Today's post isn't a card, which in itself is unusual for me!  I was challenged by a crafting friend (you know who you are Fran!) to get out my Bamboo tablet and pen and have a go at drawing in Craft Artist Professional.  Now, those of you who remember my disasterous attempt at drawing and watercolouring a cupcake last year will know that I can't draw to save my life.  But, nothing daunted, I rose to the challenge and spent a very long time producing my first ever digital masterpiece.  And here it is:


Just think of the materpiece I would have been able to create if I was actually able to draw or paint!  Oh, by the way, I think I had better say (just in case you can't make it out) this is supposed to be lavender!  And I had better come clean and tell you that I cheated with the bow - it is from a digikit - but the rest is all my own work!

For anyone interested in learning more about Serif Craft Artist Professional there is now a group on Facebook called Serif Craft Artist Users Group, which is now one week old!  If you would like to join our group, please click here and ask to be added.

Thank you for visiting my blog.

Catherine x

Friday 20 April 2012

Birthday Fishes designed in Serif Craft Artist Professional

Morning everyone

Today I would like to share a card I made for another friend's birthday, which was yesterday (I seem to have lots of friends with birthdays around this time of the year).  Anyway, this time it was a male friend, and I always struggle with male cards.  I finally decided to used the digikit "Fishing" to design a card for him in CAP.  I also challenged myself to use only the digikit and not resort to any of my crafting cds and I am pleased to say I did actually manage to do that.

So here is what I did in CAP first


I decided that I was going to use this as a topper for an easel card so needed a sentiment "stopper" to go with it:
I printed both of these off along with a sheet of backing paper, also from the digikit, and made up the card:

The card base is A5 and made from Centura Pearl card from Crafters Companion and the topper has been matted onto a couple of piece of matching coloured card from my stash.  Instead of cutting out the "stopper" I tore around the edges and inked them lightly with Tim Holtz distress ink in broken china.  The backing paper is also from the digikit and I finished the card with some card candi in matching colours.

I really love Craft Artist Professional - I can honestly say it is the best craft programme I have ever used and although I have had it since it launched I am still learning new things about it.  One of the functions which is rarely mentioned is the ability to use it to draw and paint - if only I could draw!  There is now a Serif Craft Artist Users Group on Facebook where all users, new and not so new, can meet to share hints and tips, information about free digikits and share their creations.  To join my group please click here and ask to be added to the group.  The group will be one week old this evening and membership currently stands at 107 so I reckon there must be a need for something like this.

Thank you for visiting my blog.

Catherine x

Thursday 19 April 2012

Paintbox Poppets and Serif Craft Artist Professional

Hello everyone

Today I am going to share a card I made for my friend's birthday - she used to be a dancer when she was young and is still a keen ballet fan so I thought that this Paintbox Poppets image of a young ballet dancer would be just right for her card.

I used my cd Paintbox Poppets from Crafters Companion, but designed the whole card, including insert, in my Craft Artist Professional software.  This allowed me to see exactly what the card would look like when it was finished and "tweak" the bits I wasn't happy with before printing anything out.  This is what I did in CAP first.

All the elements I have used on this, with the exception of the lace, are from the Crafters Companion cd.  I outlined the topper on the left, the sentiment and the ribbon border by clicking on them and increasing the line size.  I then used the colour picker to take a deeper pink out of the image and changed the line colour so it looks as though they have all been matted onto another layer.  I used the cutout studio to take the main image of the little dancer and then merged this into the backing paper on the right.  I also cut out the bouquet at the dancer's feet and used this as an embellishment, which is tucked in behind the sentiment.

I also used CAP to make a matching insert.  Here is how it looks in CAP


I used the stencil facility in CAP to make my scalloped layers and used the elements I had previously cut out to embellish my insert.

Once all the designing work was done I had to decide how I was going to actually make up my card and eventually decided to use the front of the card as a topper and to layer up the main image and the sentiment.  A little tip for anyone making a card this way - when you print your card out pages 1 and 3 (ie the front and the back of the card) print out onto one A4 sheet so if you want to print additional elements, but you are going to use just the card front as a topper, then put your elements onto page 3 and you will get everything you need printed out onto one sheet.

And here is the finished card.
The photo isn't great - I have had problems uploading it so have had to reduce the file size considerably to get it to upload.  Anyway, I have Spary and Sparkled both the topper and the sentiment with iridescent before adding them to the card using foam pads.  I have layered up the printed topper onto some Coredinations card in a matching colour and used a white prescored scalloped 6x6 card base.

And here is what the finished insert looks like


Again I have had to reduce the file size in order to upload this.

I am very pleased with the finished card and hope my friend will be too when I deliver it to her later today.

If anyone is interested in joining the Serif Craft Artist Users Group I set up on Facebook, then please click here and ask to be added to the group.

Thank you for dropping in to see my card.

Catherine x

Wednesday 18 April 2012

Faerie Poppets Yellow Rose Card

Evening everyone

Today I am going to share a card I made for a friend's birthday using Faerie Poppets die cut decoupage.  This is another card I managed to do while preparing everything for Easter but didn't get it into the post in time for my friend's birthday which was on Easter Monday!

The card base was seven inches square and made from white Centura Pearl from Crafters Companion.  The yellow die cut borders and central die cut and embossed oval was made using Cordinations card, the central white embossed oval and the die cut swirls were  made from Centura Pearl.  The yellow rose backing paper was a piece I had printed on vellum some time ago from one of my crafting cds but I can't for the life of me remember which one - though it is probably one of Joanna Sheen's- and the little roses and white bow were from my stash.  And of course the gorgeous fairy decoupage was from the "Faerie Poppets" set from Crafters Companion.

Here is the insert.

I made the insert in Craft Artist Professional using my Sharon Duncan Embossibilities cd for the yellow rose backing paper.  I took a photograph of the front of the card and cut out the faerie poppet image from the photograph, and also the two little groups of roses.  I used the colour picker in Craft Artist to take one of the colours from the backing paper and used it to fill the two central squares, then added the text.

For anyone who uses Craft Artist Professional, whether a newbie or an old hand, I now have a users group up and running on Facebook.  If you would like to join then please click here and ask to be added to the group.

Thank you for visiting my blog.

Catherine x

Sunday 15 April 2012

My first attempt at distressing

Hello everyone

While I was frantically trying to get my family history book finished in time for Easter, I had to also think about a birthday present for my son's partner, whose birthday was on 17 March.  I have already blogged the card I made for her but as I didn't actually give her her birthday present until they came to stay at Easter, and the fact that I was still trying to finish it the evening before they arrived, I have waited until now to post it.

I bought a couple of little cardboard cases from Crafters Companion a short while ago, one of them specifically to give to Gillian.  I decided to distress it but have never tried this technique before.  The result was one extremely distressed case!  The clear pva glue was very runny so I didn't add any water to it but think perhaps I should have done, so will do next time I try this technique.

The picture is Gizmo, their little dog.  And the other side

I sanded it lightly around the edges and then added some distress ink (think it was tea dye) because I felt the finish was too white.

Inside the case I put a cross stitch pattern that I made using Jane Greenoff's programme iStitch and the aida and threads.  The pattern was made from a photograph of Gizmo which I altered in Craft Artist Professional before turning it into the pattern.

This is the original photograph

And after editing it in Craft Artist, this is the one I used to produce the pattern


I am pleased to say that Gillian loved her present, and I have another case to work on to make another present for someone else so perhaps it won't be quite so distressed next time.

Thank you for visiting my blog.

Catherine x

Saturday 14 April 2012

Family History Book made with Serif Craft Artist Final Part

Hello everyone

Today's post is to share the last of the pages from my family history book, so I will begin where I left off yesterday.  So far all the pages I have shown have related to my grandfather's ancestors and descendents, but of course we are also descended from my grandmother's family and in this section of my book I go back up the generations on that side of  my family.  I finished my post yesterday at page 23 so today I will begin with page 24.

My great grandfather was a tailor and before their marriage my great grandmother was a dressmaker, but when my grandmother was a young woman, the family also had a couple of sweet shops.  The pins, needle and thread and the sweets were from Daisytrail digikits and I downloaded the tape measure from the internet and then cut it out using the Cutout studio.  The background and the central panel were both from digikits (I think!) and then I added the two sets of digital stitching using the brush facility in Craft Artist.

My greatgrandparents had twelve children so pages 25,26,27 and 28 are in exactly the same format as pages 8,9 and 10 with the addition of needlework or sweet embellishments, so I won't show them here.  The next page I am going to share is page 29

The background on this page was made using one of my craft cds and the frames are from a Daisytrail digikit, and I changed the colour of them.  This was a quick and easy page to make, once I had played around with the photographs to try and enhance the quality of them, and dithered endlessly about which style of photframe to use!  This is another of my favourite pages.

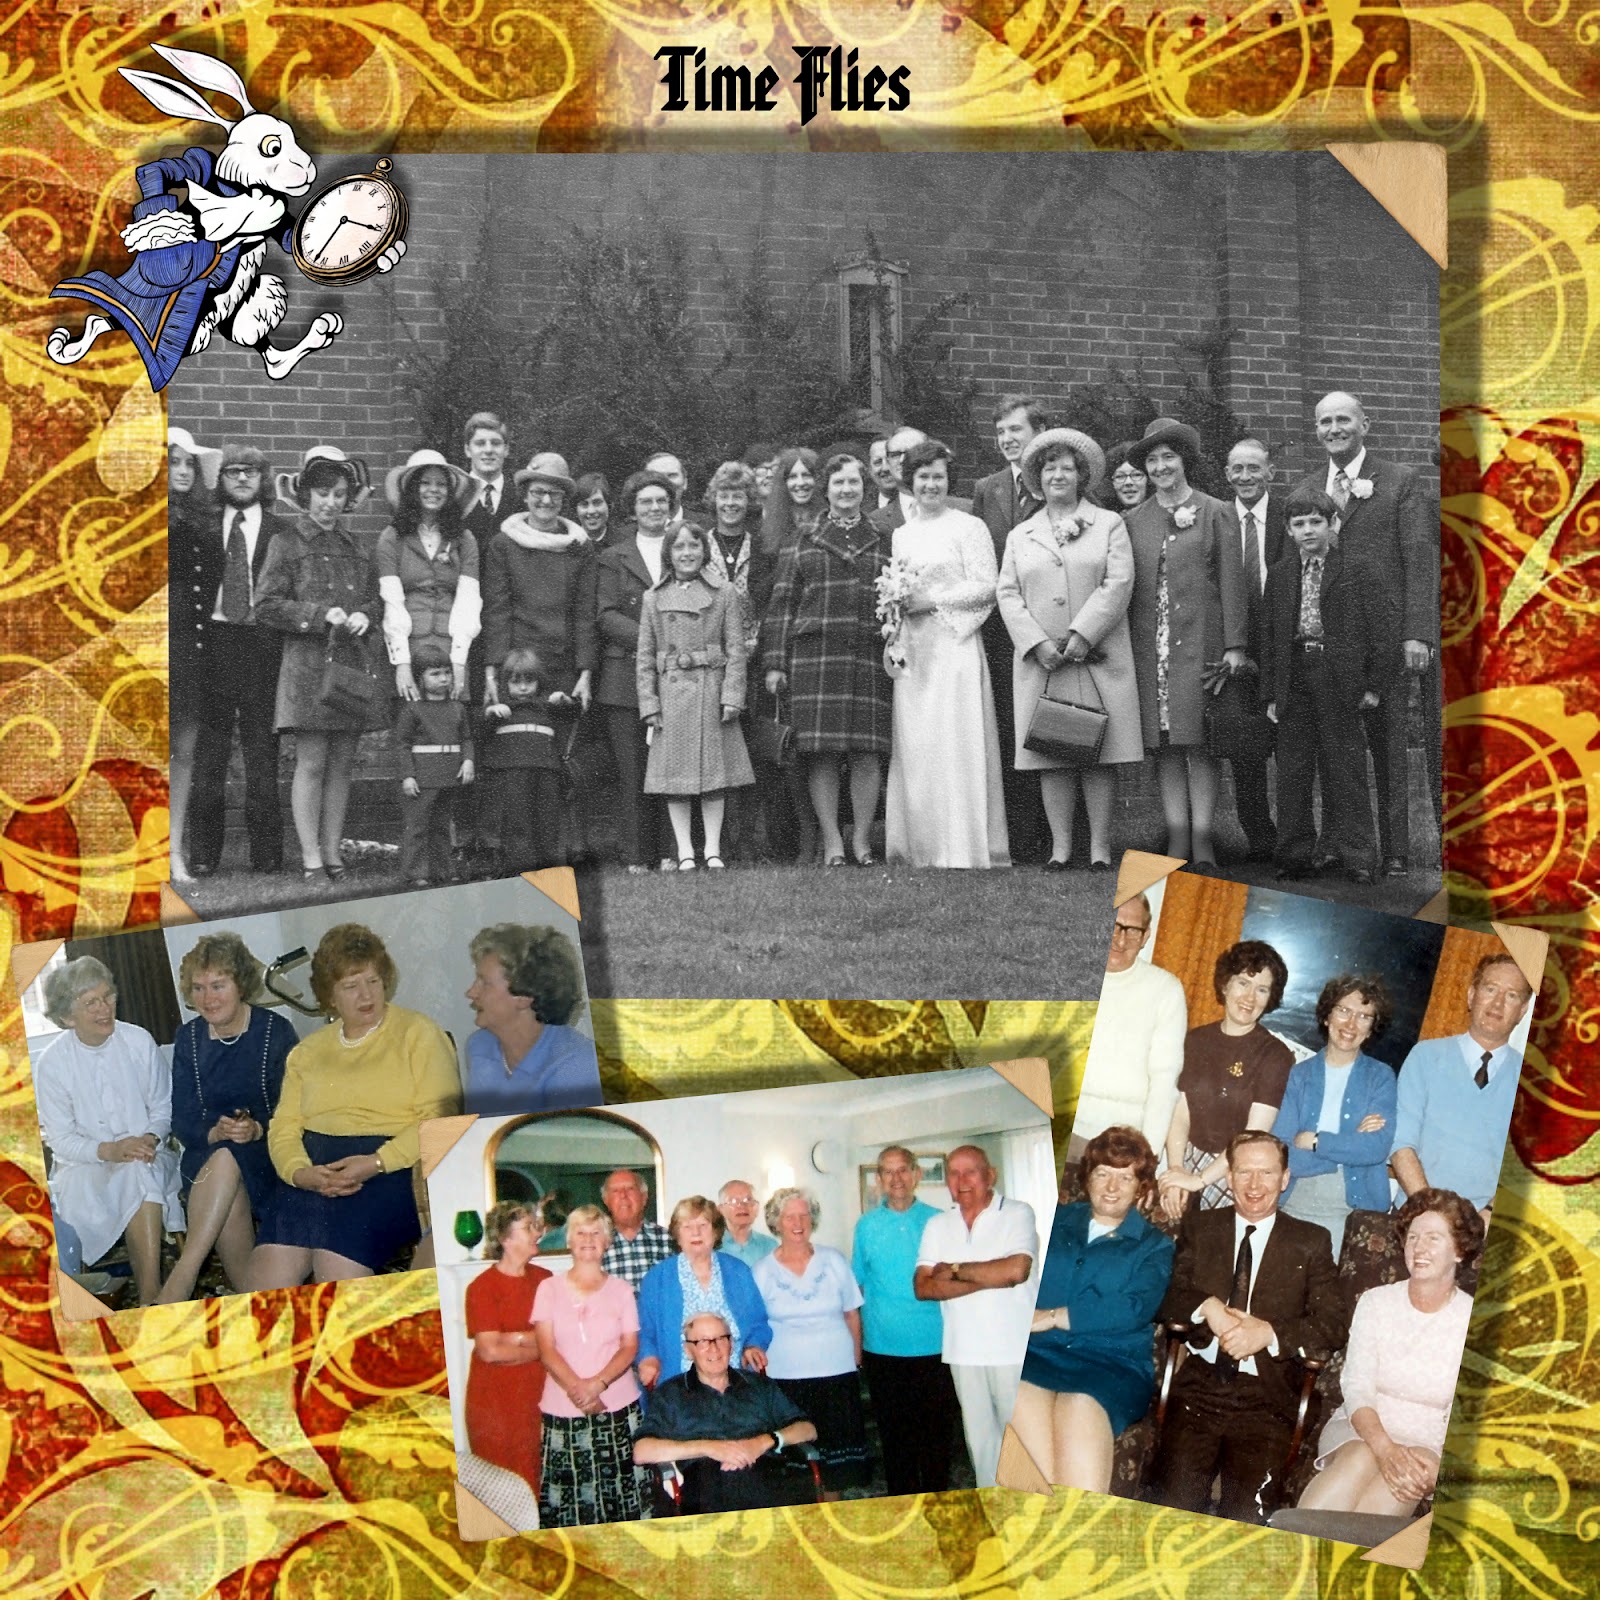
Pages 30,31,32 and 33 were a combination of photos and facts - as this stage I was worrying about the length of the book so tried to condense as much as possible.

I didn't have a photograph of my great grandmother so used a crafty elegant lady instead!

Again I made my own backgrounds using old photos, maps and documents.  As these ancestors were dyers and bleachers I just couldn't resist adding in a few sheep from a digikit.

My final page I actually started in November, before I broke my wrist, and posted it to my blog as it was at that time, so some of you may recognise it.


For the background on this page I used old military documents and postcards from the Falkland Islands which related to the Falklands Campaign, reduced the opacity of them, overlaid the Union flag reducing the opacity of that too and then did the export as image trick.  I added the topper I made in November using a Joanna Sheen image and then added the only three photographs I have of those who died.  As luck would have it there is one from WW1, one from WW2 and one from the Falklands Campaign.  I then downloaded images of the three appropriate medals from the internet, cut them out from their backgrounds using Cutout studio and added them.  I also used the page curl facility in the Photolab bit of Craft Artist on the photographs and added the pins from a digikit.  And this is another of my favourite pages.

I printed out all the 8x8 pages and made five books but as I don't have a wide format printer I had to send the 12x12 pages off to be printed.  I sent them off to DS Colour Labs in Manchester and I think they deserve a mention here because they were quick and efficient and the finished prints were of an excellent standard.  They were also the cheapest of all the places I looked at and I would recommend them to anyone wanting 12x12 prints.

I presented my two remaining aunts with a 12x12 book each at our family party and I am pleased to say that they were really delighted with them, so for that reason alone, all the hard work I did on them was very definitely worth it.

 While making this book I felt I had learned a lot more about how to use the Serif software which I consider to be the best crafting software currently available.  Many more people now have copies of this software and each of us seem to have discovered how to use different bits of it.  So with this in mind last night I set up a new group on Facebook for users to help each other, share hints, tips, answer questions and share their work.  The group is called Serif Craft Artist Users Group and in the first few hours we have gained forty members.  If you are a CA user, please feel free to join us - you would be most welcome.

Thank you for visiting my blog.

Catherine x

Friday 13 April 2012

Family History Book made with Serif Craft Artist Part 2

Hello everyone

This post is a continuation from yesterday of my family history book, done on Craft Artist.  My grandparents had eight children, so I will show you page 13 which shows the first two of their children (but I have removed vital information as it relates to living people).  Pages 14 and 15 detailing the next six of their children are in exactly the same format.

As you can see, it is done in a similar format to pages 6 and 7 but I have used a different background (I think this was from one of my craft cds) and made different mats using the stencil facility for my family groups.

Page 16 is one of my favourite pages in the whole book.


This shows my father, his siblings and his mother during World War II.  I made the background using old scanned documents and army photographs of my father, reducing the opacity.  I then overlaid the whole page with a Union flag from one of Daisytrail's free digikits - British Street Party - and again reduced the opacity.  I exported the page as an image and then brought it back in and made it into a background so that it would snap into place.  I found the Second World War medal on the internet and cut it out using the Cutout Studio.

And of course no family history book worth it's salt would be without wedding photographs so pages 17 and 18 show the weddings of my parents and my aunts and uncles.

Again I made the background and used photo frames from digikits.  I can't remember whether the roses were in a digikit or whether they were ones I cut out of a photograph myself using the Cutout studio.

To end this section of the book I inserted a page showing group photographs of my father and his siblings taken at various times over the years and I couldn't resist adding the white rabbit from the My Craft Studio "A Very Important Date".

I think this background was made from backing paper in one of my craft cds but I really can't remember at this stage.  The photo frames were from a Daisytrail digikit.

Which brings me to my generation and another different style of page.  Pages 20 and 21 were both done in this way but as they relate to living persons I have removed vital information and just left the year the photos were taken.  I will show you page 20.


I made the background of this page using a Funky Hand backing paper and I used the stencil facility to make the mats and shape the photographs to fit.  I also made the tags, but the ribbons and flowers were Daisytrail embellishments.

The white rabbit makes another appearance in page 22


I think this background came from a digikit and I simply layered up a selection of photographs from the childhood of me and my cousins with more recent photographs of us together.

And finally for today's post is page 23, entitled "The Cousins' Kids".

This is another of my favourite pages in the whole book.  The background is made using photographs of the cousins' kids when they were very small and which I changed into black and white and then reduced the opacity.  Again I did the export as image trick before adding the more recent photographs.  This time I decided I would hang them all!  The rope was from the brushes tab in Craft Artist.

I tried to make pages in as many different styles as possible in order to keep interest so I hope you will think that I succeeded in that.  Tomorrow I will post the final pages I want to share with you.

Thank you for visiting my blog.

Catherine x

Thursday 12 April 2012

Family History Book made with Serif Craft Artist Part 1

Hello everyone

Today's post is about the Family History Book I did for the family party and this is what was really keeping me occupied and panicking for the last two months.  Our family is extremely large and I couldn't possibly have included all the information I have so I did a brief overview for some of it and put a little more detail in from my great grandparents generation forward, using as many old photographs as I could.

For any fans of Serif Craft Artist, this is the programme I used for the whole book.  However, with this programme you can actually use your own photos, papers, ebellishments and items from crafting cds as well as utilising the Daisy Trail digikits.  I made most of the backgrounds myself using old photos, maps, documents, embellishments from cds etc and sometimes merging them with digikit items.  The book is 34 pages in total, and because I don't ever share current information about living people I won't be able to share some of the pages.  Because of the number of pages I will select some of them in as any different styles as I can to share, but will split this over a couple of posts to make sure you don't fall asleep!!!

I made seven copies of my book in total, two were 12x12 and five were 8x8.  I did all the designing using the 12x12 scrapbook template and simply changed it to 8x8 when I wanted to print myself and then changed it back to 12xx12 to work on again.   The 12x12 copies were printed at DS Colour Labs in Manchester and they were an excellent quality print.  In order to send them to print I exported the whole book as 12x12 pages at 300dpi jpegs so it was really easy to do.

Here is the title page


This was probably the simplest page of all of them to make.  I used a background from a digikit and a tree embellishment from my Daisytrail Family Tree Digikit which I faded to merge into the background using the opacity facility.  I added the curved text to the tree and used text from the Daisytrail Digikit which I then changed to add the Davison Family - it saved me time searching for the font I wanted!  Finally I took an old photograph of my great grandfather and cut him out using the Cutout Studio and placed him in front of the tree.

The next page is an overview of my Davison ancestors - it is actually pages 2 and 3 in my book.


These were the two pages I had problems with the background, which I made myself using photographs, a map and a watch embellishment (from the cd "A Very Important Date" by My Craft Studio.)   Users of Craft Artist will know that if you move your cursor over an embellishment etc it will highlight blue so I used the layers tab to drag everything I used for the background into the background bit of the tab and then locked it.  However, every time I reopened the file (despite saving it before I closed it) they had unlocked again.  I was having a problem with my laptop at the time (overworked!) so it may have been that to blame. What I did to cure the problem was to export the pages as jpegs with just the background there.  I then imported the jpegs, dragged them onto the project and then dragged them into the backgrounds tab on the left of the screen.  When I dragged them back out of the background tab they then snapped into place and I didn't have any further problems with them unlocking!

Pages 4 and 5 are very similar to pages 2 and 3, just a different family line, backgrounds, embellishments etc. so I will skip to pages 6 and 7.


Because I wanted to keep the interest of those looking at these books I broke up the technical family trees with some interesting snippets of informationa and photographs.  I kept the backgrounds on this page very simple because I wanted the text to be visible.  Some of the photographs I used were sent to me from other people, and whilst I was working on the book I received two new photographs of my great grandparents.  The one of my great grandmother was taken in 1875 and is the only photograph I have of her so I was really delighted to receive it.

Pages 8 and 9 were where I started to add more detail to the family tree, and this is where much of my time was spent as all the facts had to be double checked before being entered and all the photographs had to be made from larger existing photographs - some of them were very faded and in poor condition so had to be enhanced and enlarged in order for me to work with them.

Again, I made the backgrounds using old maps and photographs.  I then made all the little tags and added cropped photographs where I had them.  Once the photo was added to the tag I used the brushes tab in Craft Artist and went to Edges and then Glow to take out the harsh lines around the photograph.  I amended the width of the edge to suit each photograph.  I wanted to outline each family group so decided to make little mats to group them onto.  The photo frame was from a digikit, as was the poppy.

Pages 10 and 11 are very similar to pages I have already shown so will skip to page 12.

I actually made this page when I was nearing the end of my book and was getting very panicky about getting it finished in time so all the backgrounds, embellishments and frames I have used on this page were from Daisytrail Digikits.

One thing that I did find when doing this book was that when I got to around 12 or 13 pages I felt that the software was struggling to cope with such a large file so I decided to split the book into sections of a maximum of about eight pages and it was much easier to work with the files.

I will post part 2 of my book tomorrow.

Thank you for visiting my blog and actually reading all of this!

Catherine x

Wednesday 11 April 2012

Family Party Part 2. Prizes.

Hello everyone

Welcome to part 2 of my family party posts!

Because we decided to organise games for both children and adults alike, and a quiz for the adults, we had to think of some prizes.

We decided on little bags containing mini chocolate Easter eggs and mini chocolate bunnies for the children.  I cut these out using my Cameo and a template from Serif Craft Artist.

The bags were decorated using my Peter Rabbit cd and Humphrey's Corner cd both by Crafters Companion, and my Me to You Spring Chic cd by Docrafts.  I thought they looked really cute - and the contents were certainly well received by the children!

For the adult prizes I made some boxes and filled them with either Ferrero Roche chocolates or some liqueuer chocolates.


These boxes were made from Centura Pearl card from Crafters Companion and I used a couple of different embossing folders to make top and side panels.  I finished them with ribbon and some decoupaged pansies - and I can't believe that I forgot to take photographs of the finished boxes.  Here is one I cropped from a larger photograph so my apologies as the quality isn't too good.

I also made boxes using blue and green Cordinations card and decorated the top of them with die cut swirls and embellishments cut in a contrasting colour and, you've guessed it, I forgot to take photographs of them too.  Here is another cropped image


Those funny looking fluffy balls in the photograph are the bunnies tails I made for Pin the Tail on the Bunny.  (Well it was Easter Sunday so a rabbit seemed appropriate!)  I cut the shapes from paper using my Cameo (even put a tag on them for the names!) and then glued a cotton wool ball onto them.  I used some small squares of double sided sticky paper for actually sticking the tails onto the poster.  I eventually found a colouring picure of a rabbit on the internet at www.lucylearns.com so downloaded it, digitally removed the original tail and added a red cross for where the tail should be in Paint, enlarged it and used the Poster Print facility to print it out over nine pages.  Here is the image I used to print the poster.

                                                                                                        
And just to finish off this post here is a picture of the poster in use!


Thank you for dropping in.

Catherine x

Tuesday 10 April 2012

Family Party Part 1. Invitation

Good morning everyone.

Well, I have had a very busy couple of months - frantic even - while I was trying to complete a project for our family party which took place on Easter Sunday and, thankfully, was a great success.  Trying to find ways to keep everyone from the ages of 2 to 91 happy wasn't the easiest task but everyone enjoyed their day which made it all worthwhile (just don't ask me to help organise another one any time soon!)

As some of you will already know, I am a very keen family history researcher and I was asked to "do something" about the family history specifically for the party.  After a lot of thought I decided that the best way to present it was in book form, so I set about it using Serif Craft Artist.  It's not a book, or a scrapbook as such - a bit of a mix with lots of photographs.

Here's a photograph of some of the things I took there on Sunday, with the addition of the invitation on the top.


So I will start at the beginning which was, of course, the invitation.  This was done on Craft Artist too and was A5 in size.  The image and papers I used were from the Humphrey's Corner cd by Crafters Companion.


And the insert


I don't want to do a great long post and bore you all so I will do a series of posts to show what I was up to, which will include boxes and bags I made as well as some of the pages from my family history book.  And I will finish the set of post with some photographs taken at the party itself.

Thank you for visiting my blog.

Catherine x