Tuesday, 31 January 2012

Silver and White

Good afternoon everyone

This morning I decided I was going to play with a stamp I bought some time ago but have never used.  I did try it out briefly when I got it but was very disappointed that the stamped image looked as though the ink was "bubbled".  Some time later I heard that sometimes this is a problem with acrylic stamps and that the solution was to sand it lightly.  Hmmm, not sure whether that was a good idea - after all I didn't want to destroy the stamp altogether!  So I just left it.  Then last week I saw another, far more acceptable tip, which was to take sellotape over the surface then ink it up with Versamark and allow it to dry before using (thank you Ali Watson!)  So I reckoned I had nothing to lose by trying it and it seems to have worked because there was no "bubbling" when I tried it this morning. This is  large corner stamp and, on reflection, I think I was being a bit adventurous trying it out because it requires a large acrylic block and I discovered that it put quite a strain on my poorly wrist.  However, I perservered and ended up with this card.


I used Neenah card from Crafters Companion to stamp onto and silver pigment ink (think it is Encore).   The card base is 7x5 pre-scored card.  I would be very interested to hear what everyone else thinks of this as I am not too sure about it.  Firstly I think it would probably be better suited to a wedding or silver wedding rather than a birthday but I had decided I wanted to stamp the sentiment in a square for the centre of the card and I only have birthday, thinking of you and Christmas stamps like this!  Secondly, it took me about ten attempts to get the square almost straight and eventually I realised that the stamp itself is actually slightly out of line - the happy and birthday are at different levels on one side which is why I couldn't get a perfect square.  Here's a close up


Not the best photograph I'm afraid.  Anyway, this is my card for today.

Thank you for calling in.

Catherine x

Monday, 30 January 2012

Busy Doing Northing

Afternoon folks

This morning I headed up to my craft room quite early - decided everything else could wait because I wanted to play.  I spent a very happy hour or two messing about and then settled down to actually make a card.  I recently bought one of Sheena Dougass' "Little Bit Sketchy" stamps (Busy Doing Nothing) from Crafters Companion and managed to cut it out last night so decided to use that today.

I stamped the image onto some Elegance Satin paper from Joanna Sheen, coloured it using my ProMarkers and cut it out using a Spellbinders nestie.  I intended to spray it with Spray and Shine from Crafters Companion but picked up the wrong can so it ended up being Spray and Sparkled instead!

Here is the finished card


I have used Tim Holtz distressing ink in milled lavender around the edges of the oval and dusty concord along the cut edge before mounting it onto yellow card also cut with a Spellbinders nestie. The yellow patterned backing I made when I was messing around - I inked up an embossing folder before embossing a piece of Neenah card.  I then dusted over the surface with some pearlescent Cosmic Shimmer mica powder, though it's difficult to see on the photo.  Here is a close up


Finally I embossed a piece of Coredinations card from Crafters Companion using a "Special Touch of Mica" mask (ivy) and lightly sanded it back to form the other piece of the backing.  Overall I am quite pleased with this card and hope you like it too.

Thank you for visiting my blog.

Catherine x

Sunday, 29 January 2012

First Strawberry Kisses Card

Good evening everyone

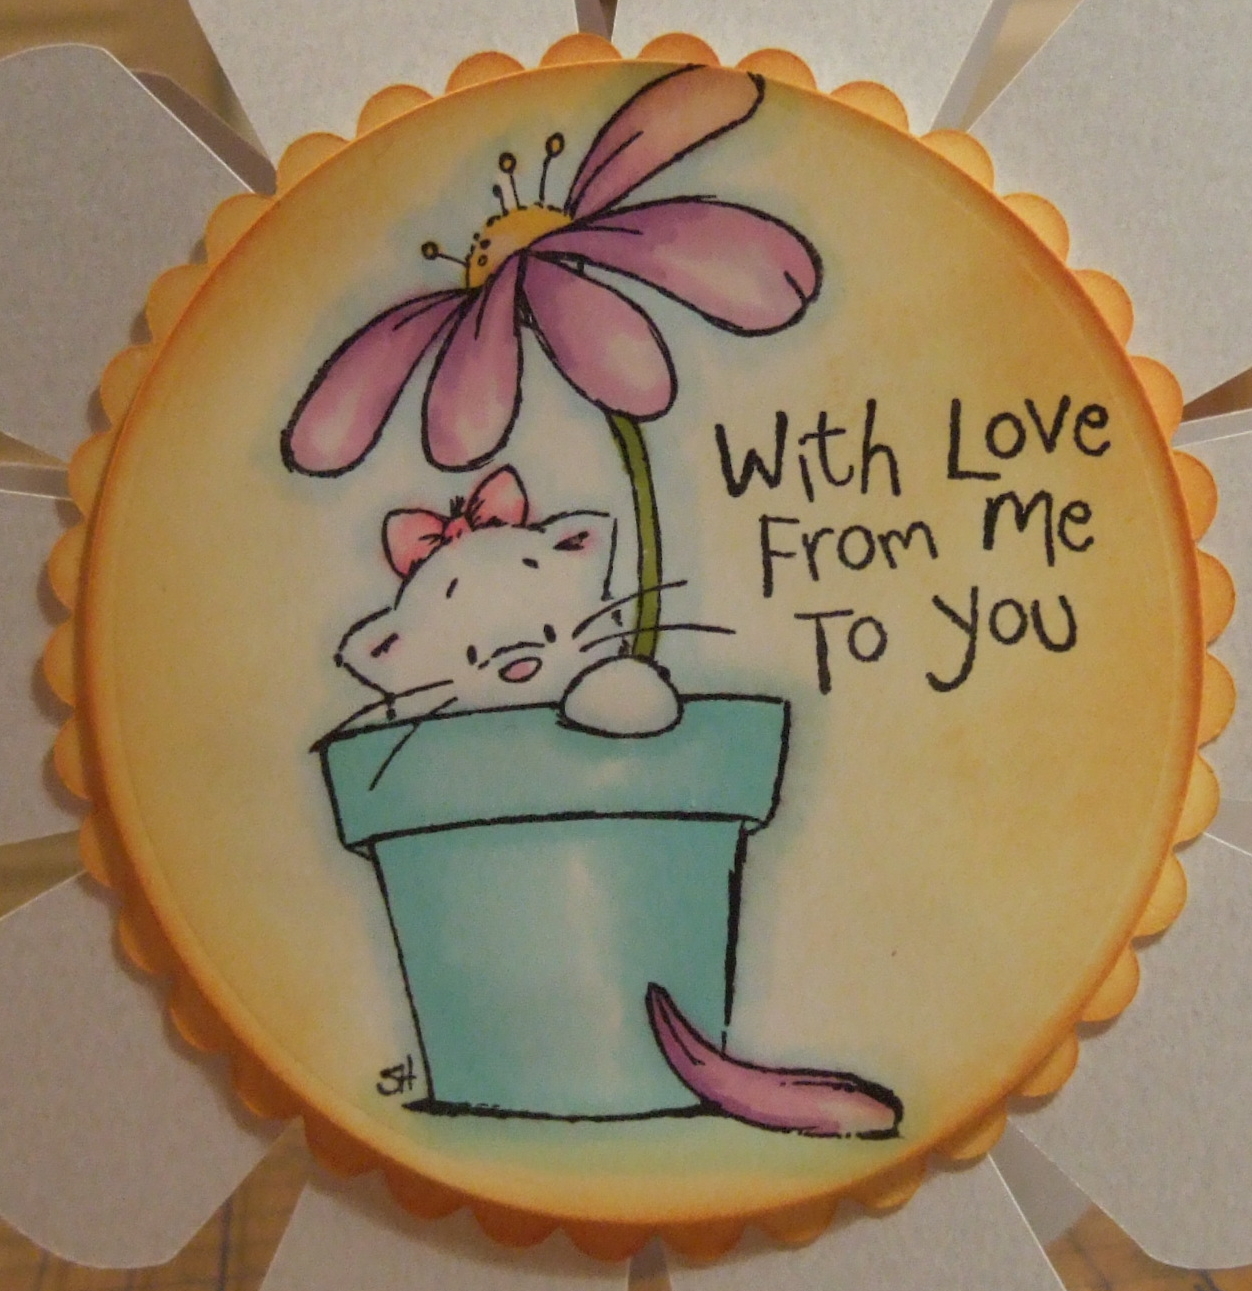
Well, I managed to get into my craftroom this afternoon and decided to use my newest rubber stamp from the "Strawberry Kisses" range from Crafters Companion.  It's called "Flower Power".  I coloured it using mainly FlexMarkers with only the yellow done in ProMarker.  Here's the card I made when I had coloured it:


The flower shaped card base is made from Centura Pearl from Crafters Companion and I cut this out using my Cameo.  The image is stamped onto Neenah Card, also from Crafters Companion and both the circle and scalloped circle that form the centre of the "flower" were cut using my Spellbinders nesties.  I coloured both using Tim Holtz distress ink.  This was the second image I coloured - I had a little accident with the first one when I stamped the sentiment onto it - the sentiment stamped beautifully but there was obviously some ink on the edge of my rocker block and I ended up with a long black line right through the image!  Grrrr!  Good job I had stamped the image out twice to start with!

Here's a close up of the topper


I think I must be a bit odd because I really wanted the card to have the overall appearance of a flower with a yellow centre!

Thank you for calling in.

Catherine x

Saturday, 28 January 2012

Friendship is the Breathing Rose

Good afternoon folks

Well, last night I vowed to tidy up my craft room as I was down to about 6 square inches of working space so I spent a lot of time today doing just that.  I wouldn't say the room was pristine when I finished, far from it, but at least I had space to work in.  And of course once I was in there I needed to do something.  I decided I would make a reasonably quick card though as playing time was getting short, and so I took another of my flower photographs, which I had already played around with in Craft Artist, printed it and turned it into an easel card.


This card is made from a 15cm square card base and I have used a lavender coloured smooth card from Craftsite, a pink foil paper I bought years ago from Create and Craft, and some deep pink Stardream paper for the matting and layering.  I used a rose embossing folder on the lavender card behind the topper, printed the sentiement onto plain white paper and then cut it and another piece of lavender card using dies.  The ribbon and the gems are from my stash.  I think I need to add another little embellishment in front of the sentiment.

Here is the original photograph


I wish I could say that I had also grown this rose myself, but unfortunately I can't - it was included in a bouquet.

Thank you for dropping by.

Catherine x

Friday, 27 January 2012

Blossom Card

Good afternoon everyone

This afternoon I have made a very quick card using a photograph I took a couple of years ago.  I started to play around with some of my flower photographs in Craft Artist last week and used one of them for this card.  I have added the text direct to the photograph.  The card itself couldn't have been more straighforward to make and just took minutes.  Faffing around deciding which photo to use and what text to add to it took forever!


The card base is a 15x15cm pre-scored card and I have used Stardream paper in brown and bright pink to layer the photograph onto.  The flower photo was printed onto Joanna Sheen's gentle gloss paper.  The piccie of the card isn't the best because I had to turn it away from the light due to the reflection on the gentle gloss card!

Here is the original photograph


I have lots of flower photographs stored on my pc - some are quite good and others not so good.  When I first started out making my cards I used a lot of my own photographs in my little £5 cardmaking software and made purely printed cards.  After a while I started to add a little piece of ribbon here or a flower there - and look at me now!

Thank you to Chris at Crafting Heaven for posting a pic of a card she made using one of her own flower photographs for inspiring me to get cracking on this!

Thank you for visiting my blog.

Catherine x

Thursday, 26 January 2012

SWALK Daydream Believer

Good evening everyone

As some of you will probably already know, on Tuesday afternoon I got my pot off my right wrist, nuch to my relief.  However after seven weeks of being held in one position my wrist joint is extremely stiff, to say the least, and actually quite painful when I try to move it in certain ways.  I was told I needed to have physio for six weeks and although the referral sheet was marked as urgent I am still waiting for them to contact me with an appointment!  In the meantime I have been "trying out" my hand to see what I can and can't manage to do - much to my disgust I found I was now able to do the washing up!  As long as I don't actually have to scrub the pots, that is!  Anyway, another thing I decided to try was to use my ProMarkers.  I found an image I had stamped out in December before I did the dreaded deed of breaking my wrist and gave it a go yesterday afternoon.  And I was very relieved to find that I was able to colour it.  So of course what else was I supposed to do with the image once it was done but turn it into a card.  So without further ado, here it is:


The stamp is "Daydream Believer" from the SWALK range and is stamped onto Neenah card both from Crafters Companion, and the backing paper is from one of my Joanna Sheen cds.  I used Tim Holtz distress ink "stormy sky" and a shaving brush to lightly colour the edges of the topper which was cut using a Spellbinders nestie. The blue linen effect card was embossed with a daisy embossing folder and it, the  pink ribbon and flowers are from my stash.  I have yet to add a sentiment and insert. 

Hmmm, wonder what else crafty I can try out my hand on tomorrow?

Thank you for dropping in.

Catherine x

Monday, 23 January 2012

Zodiac Card

Evening everyone

The challenge over at the CD Sunday Challenge Blog this week is Zodiac.  Now this is not something that normally interests me - I don't even read my horoscope - so the theme is definitely out of my comfort zone.  However, I then remembered that there was something zodiac themed on Rob Addam's cd "Big Cards" so thought I would give it a go.  My own star sign is Libra so that was what I chose to use on this card.

I made the black card base from smooth skin truly black card from Craftsite and layered more black card and gold card before adding the sun ray backing paper from the cd.  The corner zodiac circle embellishments and the layered topper are also from the cd.

So there you have it - my first ever zodiac themed card.

Thankyou for visiting my blog.

Catherine x